By Mark Rais, author of Linux For the Rest of Us, and senior editor of reallylinux.com
The
following tips will hopefully help give a well rounded view into the
necessary settings and configuration that apply to most newer
flavors.
For older flavors using KDE or older versions of SuSe, you will need to
install the PPPoE driver before
configuration is possible. These drivers should be on your
Linux
flavor’s website.
You'll find that connectivity to your broadband service using almost all flavors of Linux is dependent on two things:
I’m going to assume you know how to start the SuSe or other flavor’s configuration tool. It is slightly different among flavors using KDE. For instance, Mandrake uses the drakconf tool and has modem connections under the Network & Internet icon, then the New Connection icon.
For this example, I include details from SuSe’s configuration tool, YaST. You will see the menu item Network Devices. Selecting it will reveal the DSL Modem configuration module. For cable modem users, the configuration can also be done simply through the network card configuration. As long as you set the following network card settings correctly the cable modem should respond properly.
Regardless which you’re trying to install, please make sure that either your cable or DSL modem is properly connected before clicking the DSL Modem module or Network Card module since it checks for hardware.
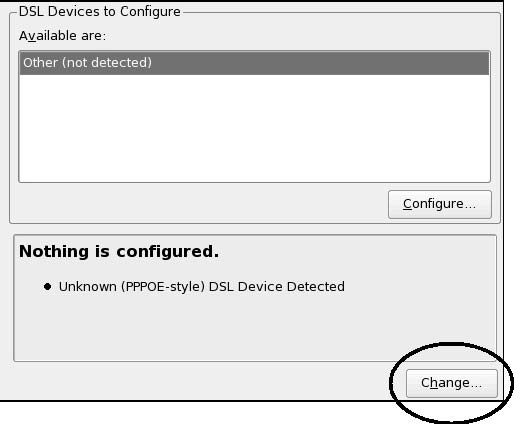
Select the DSL modem option and you will see this screen appear:
You’ll notice that in most cases a DSL modem was not yet identified. Click on the Change button to start the configuration.
The next window that appears is a configuration overview listing. Once you complete configuration the upper box will include your modem specific information and the lower box will include details regarding your service provider.
Below is a sample DSL configuration overview window:
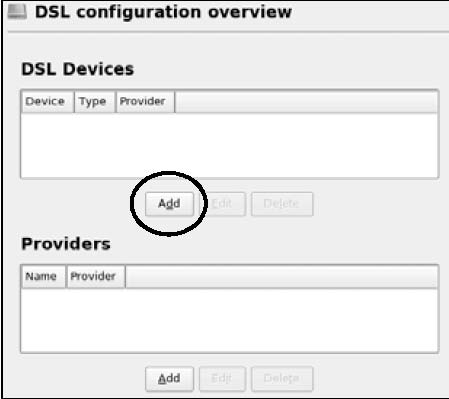
Press the top Add button to add a your DSL modem.
You’re now faced with the configuration window. Although it looks rather daunting, there is very little you actually need to do here.
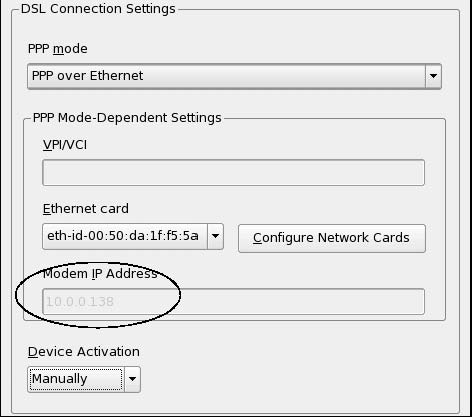
Be sure that the proper PPP mode is selected from the upper pull-down menu. In all cases I’ve run into, your broadband modem requires the use of the PPP over Ethernet. Be sure that you have a properly configured network card before starting this step. If your network card is properly installed already, it will show up in the Ethernet card box.
Sometimes the Ethernet card is NOT configured properly. In my example above, you’ll notice, for instance, that although somewhat subdued there is already an IP address noted! If you’re installing a new DSL device for the first time, this may mean that your card is not configured properly for a broadband connection. To ensure that all preloaded IP addresses are deleted, please click on the Configure Network Cards button.
You will now see a window labeled Network cards configuration. If you were configuring a Cable modem, you would have started out here. From this window you will be able to edit your network card’s details.
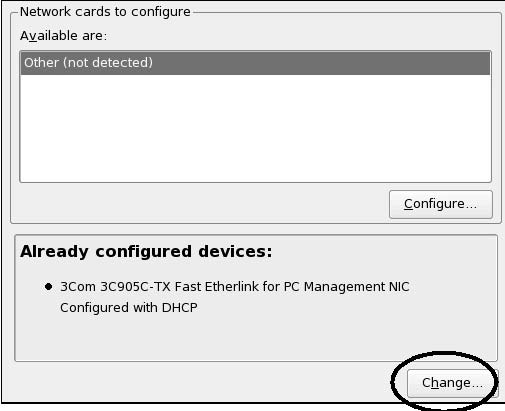
Please press the Change button. Then press the Edit button. You will now see the Network address setup screen.
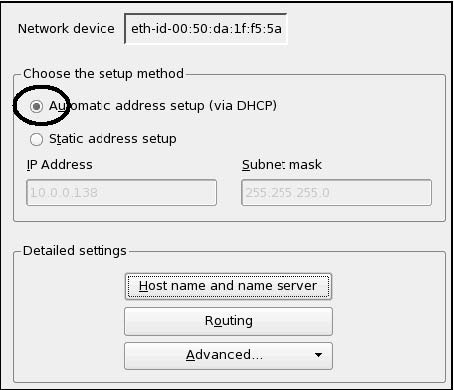
Notice
in my example that although I’ve selected Automatic address setup
(via DHCP) under
the IP Address and Subnet mask fields some data still exists. This was
from the time I setup my Linux box as a server and manually configured
the IP. In fact, to provide a learning opportunity, I had
recommended
doing so during the Installation chapter.
However, to use a standard broadband connection you will need to ensure all data is cleared from these fields.
First, select the Static Address Setup button. Then delete the IP and Subnet mask information in each of the boxes.
Now select the Automatic address setup.
You may also need to clear fields under the Hostname and DNS setup.
Click on the Host name and name server button, and then choose Modify if the option appears. This will allow you to remove the host name, domain name, and all other data in the fields. Once you delete the information please be absolutely certain you have selected the two boxes: Change host name via DHCP and Update name servers…
These two are essential for getting the right data from your ISP regarding your DSL connection (see the example screen below).
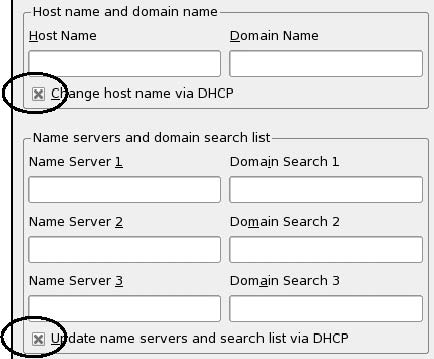
Once you’ve successfully deleted all the information in the fields and selected the two check buttons, you can comfortably click on the OK button to return to the Network address setup window.
From the Network address setup window, click the Next button. You’re almost done with configuring your modem, so hang on! Finally, on the Network cards configuration overview click the Finish button.
It may seem like a lot of extra leg work, and in some cases it is not necessary, but these extra steps have ensured that all data is properly configured. My goal is to help you clean up and prepare your system for Internet broadband use and from my experience this process is the most thorough means of ensuring you succeed.
Now, on the DSL configuration screen, press the Next button to begin your ISP setup. (Note: if you still see an IP address, it will not effect anything since you’ve done all that is needed for the configuration)
Most DSL providers are not listed. So you will simply need to configure your DSL provider data manually. Click the New button.
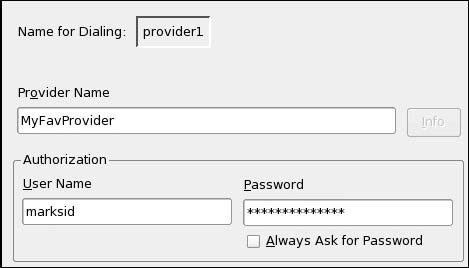
Enter the provider name, and then your DSL account name and password.
All DSL providers, when you sign up, will give you an account id and password, as well as some details on the outgoing and incoming mail servers. If you did not receive this information or lost it, please contact your specific ISP’s technical support.
Click Next to see the DSL Connection Parameters window.
Key
parts of the DSL Connection parameters window are shown below:
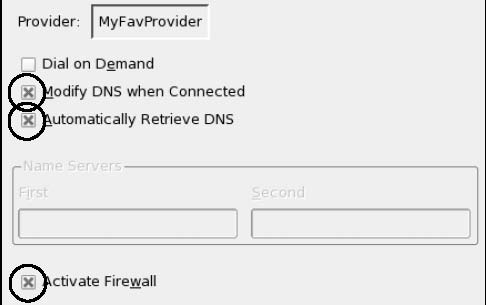
Just a tip that you should be sure to select the three boxes indicated with circles. Now click Next again to view the final summary of your changes.
Believe it or not, you have now configured your mode and your provider information! Pressing Finish will save all of your information.
You may notice an option appear to configure your mail. Simply press No for the time being. You will be able to configure mail using the Xiamian Evolution software in the Desktop Interfaces section.
As I mentioned earlier, rebooting can prevent many frustrating experiences with hardware configuration. I strongly recommend a reboot after any new modem or network setup.
Once your Linux system is back up and running, and you have logged in, open the web browser and try some web surfing!!!
(Fedora or Gnome users: click here)(if you found this article helpful, you may also benefit from our other Linux guides.)